- Welcome to Douglasmotorcycles.net.

Find, Fix, Restore, Ride - Douglas motorcycles


-
 Veteran fork spindles
by Majorduncan
Veteran fork spindles
by Majorduncan
[03 Jan 2026 at 20:21 ] -
2/34 project for sale
by Majorduncan
[30 Dec 2025 at 21:05 ] -
LEFT OVER PARTS FROM DOUGLAS RESTORATIONS FOR SALE.
by Majorduncan
[25 Dec 2025 at 13:51 ] -
douglas aero 600project bike for sale.
by alistair
[24 Dec 2025 at 12:14 ] -
Douglas Pulleys & Douglas Beaded Edge rims
by Majorduncan
[22 Dec 2025 at 00:05 ] -
Wheel rim for sale
by Majorduncan
[22 Dec 2025 at 00:02 ]

-
 1914 Handlebars
by Chris54
1914 Handlebars
by Chris54
[04 Jan 2026 at 09:13 ] -
 2 3/4hp timing gears
by Black Sheep
2 3/4hp timing gears
by Black Sheep
[25 Dec 2025 at 06:43 ] -
Amal 7/8" Straight Pull Twist Grip Slide & Retaining Ring
by JMACD013
[24 Dec 2025 at 18:48 ] -
 Spares Lists, London Douglas Motor Cycle Club
by Doug
Spares Lists, London Douglas Motor Cycle Club
by Doug
[21 Dec 2025 at 05:59 ] -
1927 EW350 Generator drive parts wanted
by cycarmark
[20 Dec 2025 at 13:52 ] -
 How to Advertise Safely
by Dave
How to Advertise Safely
by Dave
[04 Dec 2025 at 19:01 ] -
FT35
by lap35
[13 Nov 2025 at 18:20 ] -
Fron brake and clutch levers
by paulg
[13 Nov 2025 at 02:19 ] -
Mark 1 and Mark4 parts needed
by yosemite
[06 Nov 2025 at 10:14 ] -
Dragonfly project wanted
by Naggis
[03 Nov 2025 at 18:11 ]
 Recent Posts
-
Seized
by Ralf
[Yesterday at 20:42] -
1914 Handlebars
by Chris54
[04 Jan 2026 at 09:13 ] -
Veteran fork spindles
by Majorduncan
[03 Jan 2026 at 20:21 ] -
mk5 side stand
by Doug
[03 Jan 2026 at 16:04 ] -
Medal For Sale
by Red
[01 Jan 2026 at 14:06 ] -
2/34 project for sale
by Majorduncan
[30 Dec 2025 at 21:05 ] -
LEFT OVER PARTS FROM DOUGLAS RESTORATIONS FOR SALE.
by Majorduncan
[25 Dec 2025 at 13:51 ] -
2 3/4hp timing gears
by Black Sheep
[25 Dec 2025 at 06:43 ] -
Amal 7/8" Straight Pull Twist Grip Slide & Retaining Ring
by JMACD013
[24 Dec 2025 at 18:48 ] -
douglas aero 600project bike for sale.
by alistair
[24 Dec 2025 at 12:14 ] -
Basil's Douglas
by Diecast
[22 Dec 2025 at 09:12 ] -
Douglas Pulleys & Douglas Beaded Edge rims
by Majorduncan
[22 Dec 2025 at 00:05 ]
Quick Help
Some useful articles from the User Guide.
Membership
Posting and Messages
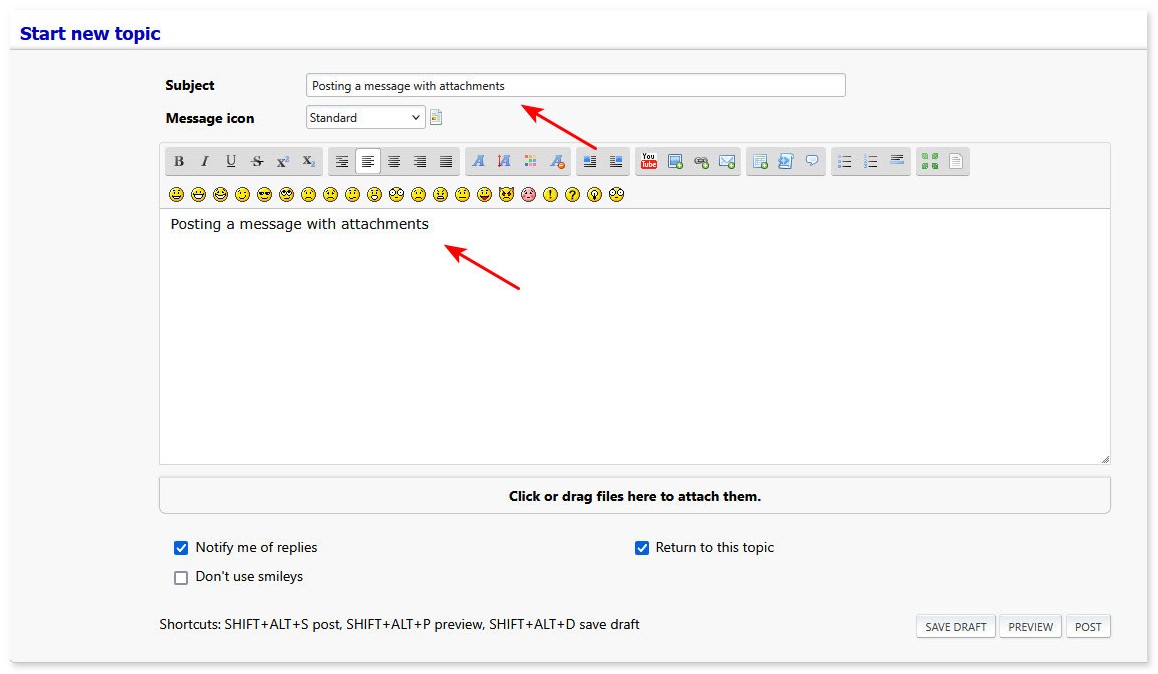
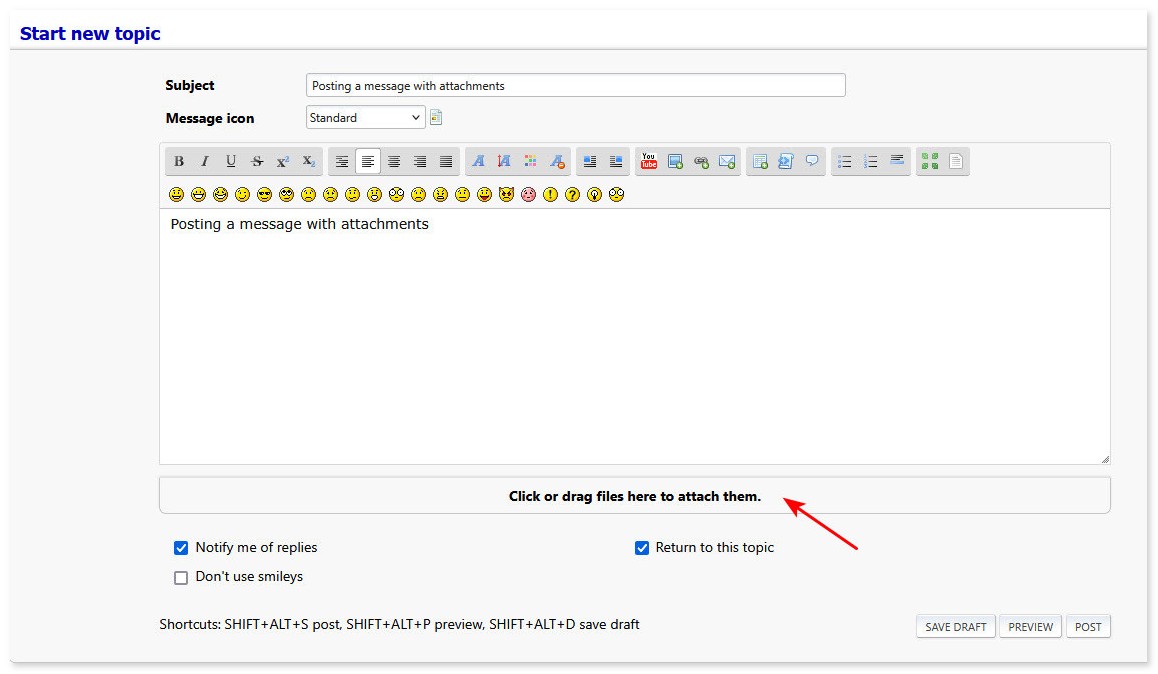
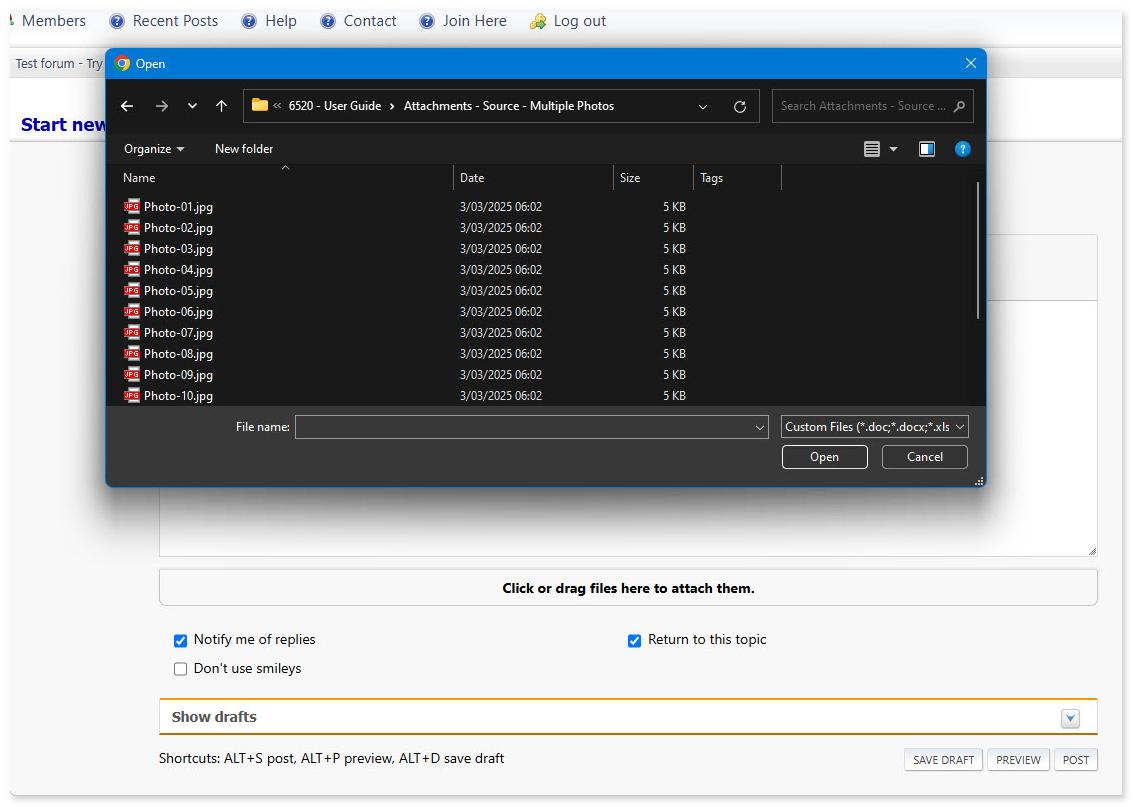
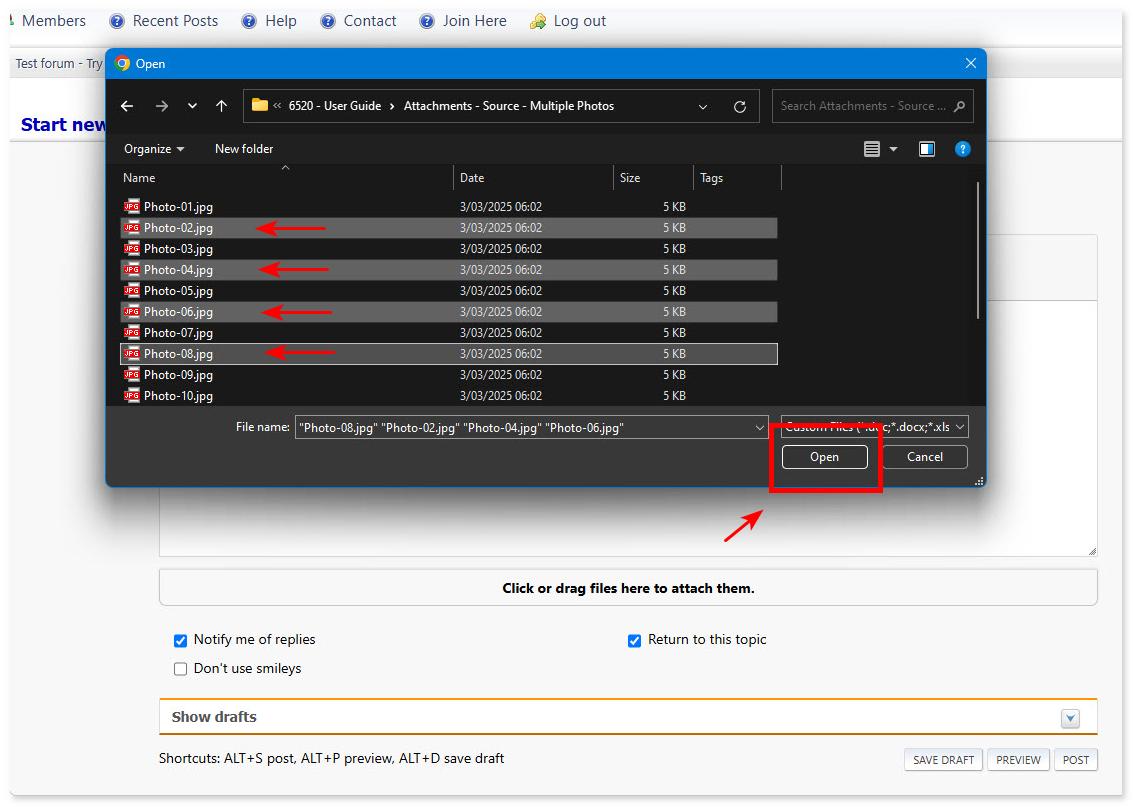
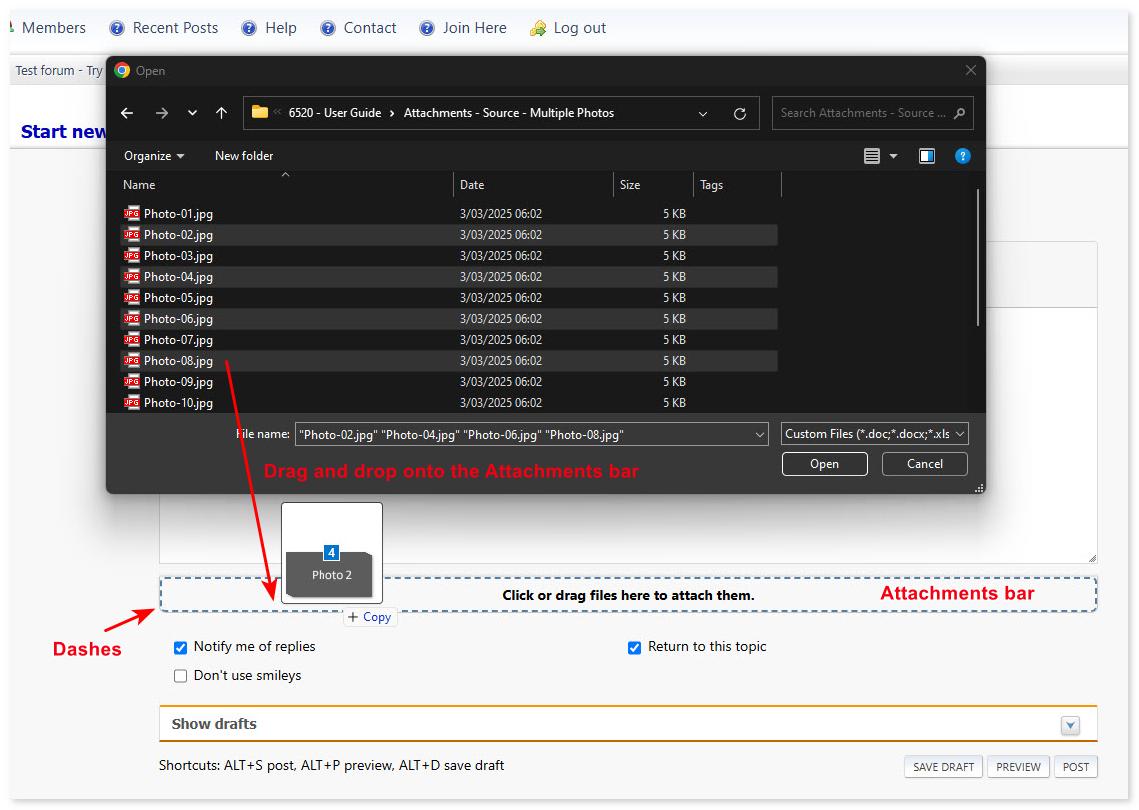
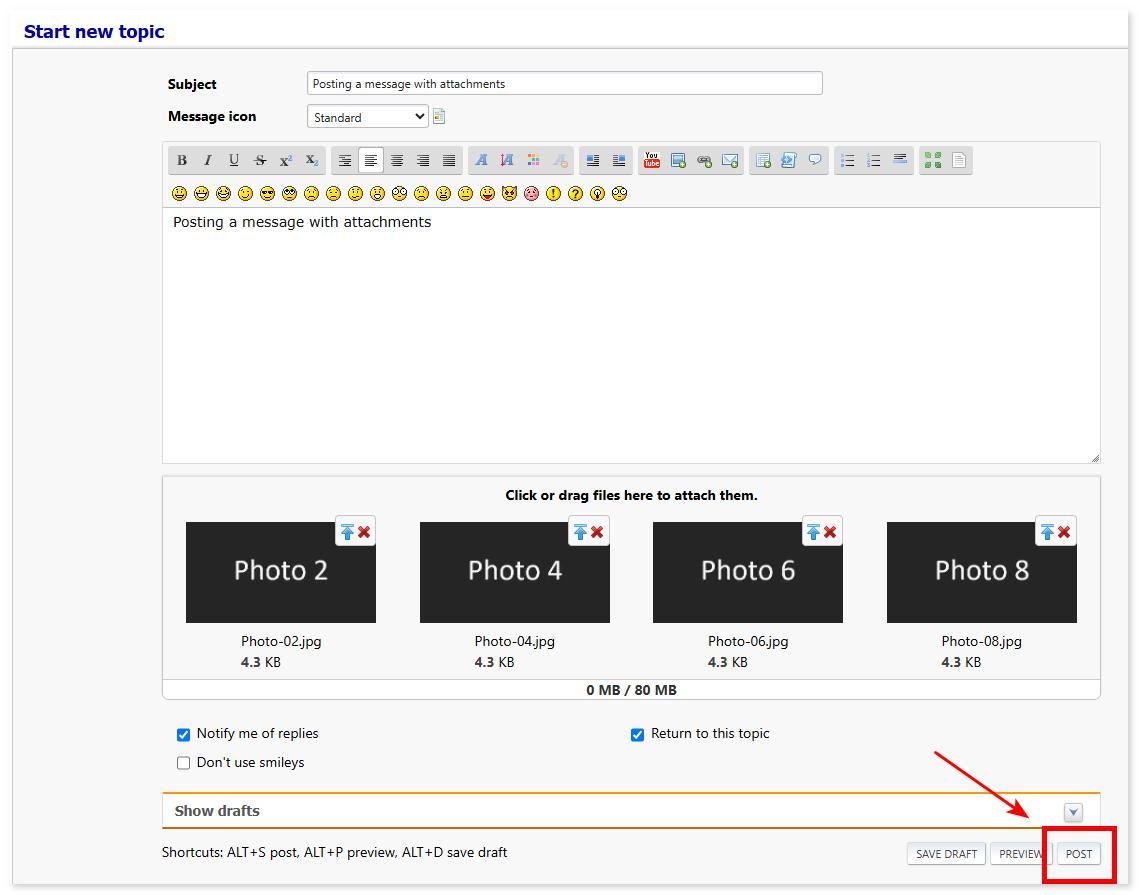
Add photos and files to your post
More guides are in the User Guide.
Membership
Posting and Messages
Add photos and files to your post
- Add a photo or file to your post.
- Add multiple photos or files to your posts.
- What files can I attach to a message?
More guides are in the User Guide.